Last Updated on August 19, 2022 by
Maybe you drive to and from doing errands throughout the day, maybe you love to head out to the game or the theatre at night, maybe you drive solo and maybe you commute with family and friends. Whatever the case and wherever your travels take you, there can be no denying that you drive your car a lot – and you wouldn’t have it any other way!
But if you could change one thing, it might be the concerning amount of grit and grime and overflow of engine slime that emanates from your motor beneath the hood. On the one hand, this is a normal byproduct of the gasoline and other elements that make your motor go. On the other hand, once it starts to build up too much, it can start to smell and, what’s worse, it can cause serious problems for your engine. If you neglect it for too long, you could find your engine’s performance beginning to suffer – or, worse still, malfunction, with dangerous results.
You don’t want any of that to happen, which is why you’ll want to follow these tips and tricks for cleaning your car engine.
1. The Tools You’ll Need
For starters, you’ll need to make sure you have the proper tools on hand.
To really give your car the good scrub down it needs, you’ll want, at the very least:
Cleaning wipes: If you are a parent, there’s a fair chance you never leave home without these anyway. Baby wipes or any other kind of cleaning wipes will do in a pinch. Just make sure that whatever wipes you are using are strong enough for the job. The last thing you want is for your cleaning wipes to disintegrate, get into the engine, and cause even more problems.
Hose: This shouldn’t just be a garden variety garden hose, but one specially designed to help clean out your car. That said, if you have the proper modifications and fancy yourself a DIY whiz, you can try jury-rigging a makeshift engine-cleaning hose yourself.
Soapy Water: This you can probably figure out for yourself – obviously, nice and warm!
Garbage bag: You’ll be getting rid of lots of gunk and debris, and you’ll also need to put up a shield around the engine while you’re cleaning it. A garbage bag (as long as it’s a good, sturdy variety, so don’t use extra-thin types!) can be a good fill-in option here.
Microfiber towel: You’re obviously going to need something with which to clean the engine, and this should be your item of choice. There are several reasons for this, not the least of which being that these towels are a lot softer and more absorbent than paper towels. They are also far sturdier.
2. The Cleaning Begins
To begin with, you’ll want to give things a good rinse. This is a good way of getting rid of any loose grime or dust. Drape the garbage bag over the area you plan on cleaning. This isn’t the end of the process, just the beginning, so your engine doesn’t have to be squeaky clean.
3. Let the Engine Cool and Prepare
Hot engines and cleaning agents don’t mix. That’s why you’ll want to make sure that the engine is off and sufficiently cool before you start doing anything. Pop the hood to let it cool faster.
While you’re doing this, you’ll want to get things in place for the cleaning and draining. You don’t want the washed away gunk to drip down into your engine and the bottom of your hood, which is why you’ll want to put down pans and garbage bags before getting started.
You also want to make sure that you disconnect the battery, since obviously water and active electrical circuits do not mix. Make sure you have the carburettor, alternator, and distributor completely covered.
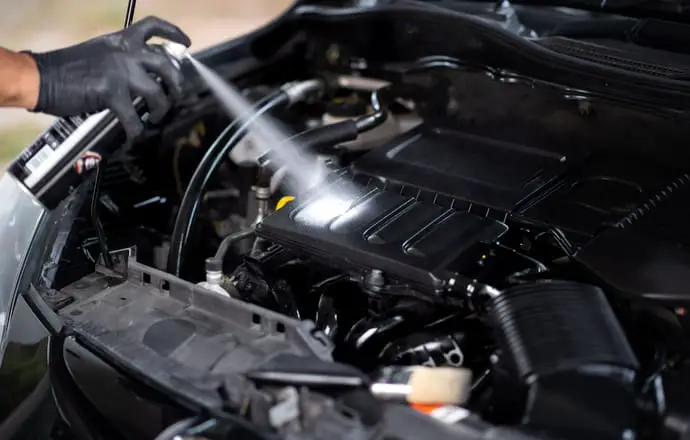
4. Get Spraying and Brushing
Now it’s time to get spraying. You don’t want to do this multiple times, obviously, so you need to make sure that you get everything cleaned out the first time. That means applying a good deal of water and, on top of that, that soapy mixture or, if you have it, engine degreaser.
You want to pay special attention to anywhere that’s oily, as these are the areas that can become especially grimy or begin to corrode over time.
If you have a soft brush, this is the ideal place to use it.
5. Reconnect, Refurbish, and Air Out
Now that you have cleaned everything out in your engine, you need to put everything back in place. This means reconnecting all the different parts in your engine which you initially disconnected so as to avoid electrocuting yourself while washing them.
At the same time, you’ll also want to make sure that you are able to dry down the engine and surrounding area. You should obviously also remove the garbage bags and receptacles into which the refuse has dripped at this point.
You’ll want to use a towel to dry everything down. Ideally, you should use a chamois or microfiber towel which is soft and absorbent, but any old towel will do. You should also make sure that you air out the engine and entire area beneath the hood so as not to allow water to build up and evaporate there with problematic results.
Once you have done that, simply check your engine and make sure that it’s clean and functional, and you should be good to go.
It is incredibly important to make sure that your engine is clean and in good working order. The longer you ignore this, the greater the problem will be. Thankfully, all it takes is a few basic tools to make sure that your engine is clean, dried, and in good shape. Just follow these steps, be vigilant, and you should be able to keep your engine clean and running.
